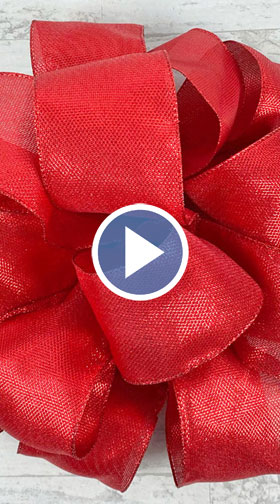
How to Make a Car Bow Out of Ribbon
How to make your own bows
by: Chica
This post may contain affiliate links and we may be compensated if you make a purchase after clicking them.

With Christmas decorations going up and wrapped packages going under the tree, we all find ourselves in great need of bows. This doesn't just happen at this time of year, though. We need bows all year long, for packages, baskets, and boxes. You might need a big red bow to put on a new car, furniture, or other large gift. Or you just might want a bow made with your own special ribbon selection. The good news is that it's easy to make your own bows from just about any ribbon you'd like, using the same easy technique.
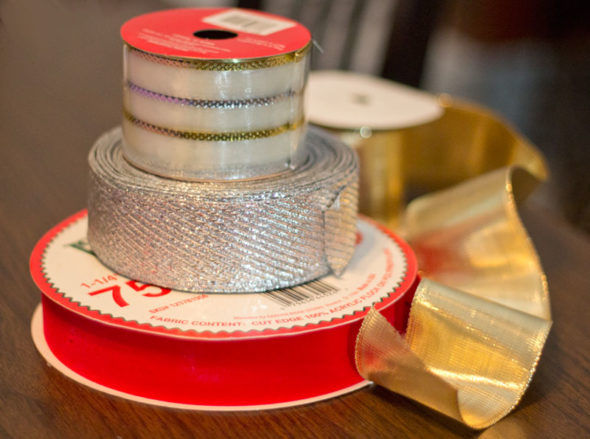
Choosing the ribbon to make your bow
You can use any ribbon you want, but we do recommend using wired ribbon for the best results. The wired edges let you shape the loops exactly how you want them. This technique also works great for ribbon that is only printed on only one side, since only one side will end up showing on your finished bow. The width of the ribbon will determine the size of your bow to a degree. In general, thin ribbon should be used for small bows, and wide ribbon should be used for large bows.
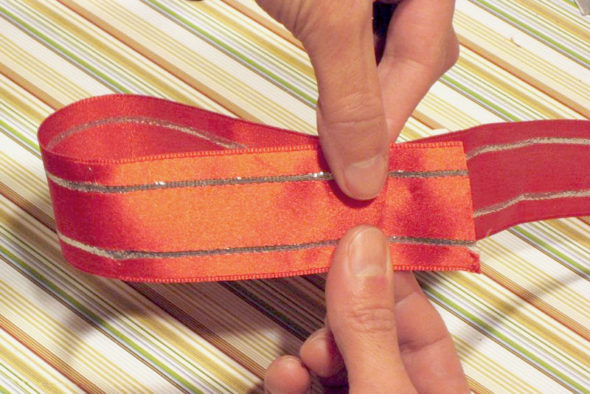
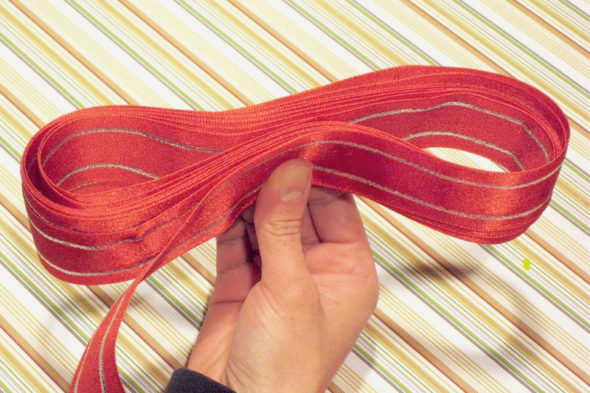
Step 1 - Forming the first loop and determining the bow size
For the best proportional results, you'll want the length of the bow's loops to be about 2-3 times the width of the ribbon. So, if you have 1" wide ribbon, your loops will be 2-3" long, making a bow that's 4-6" across when completed. You've got some leeway here with the loop size, but don't go to extremes. If your loops are too short or too long, your bow will look funny. For the bow I made in this tutorial, I used 1.5" wide ribbon, and made 3" loops (twice the width).
Make the first loop in the ribbon, measuring the width. Let the end of the ribbon overlap your center point by about an inch (so that the end won't fall out of the bow later).
Then make the second loop, and pinch it in the middle. Take care here to measure the width of the loops and the total width of the bow, to make sure you're in the right range. (My bow is 6" wide in these photos, with 3" loops.)
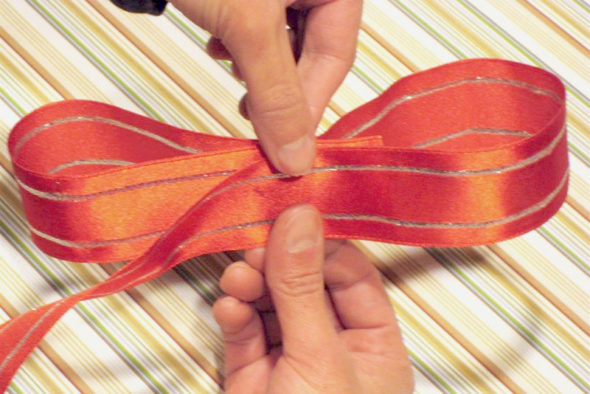
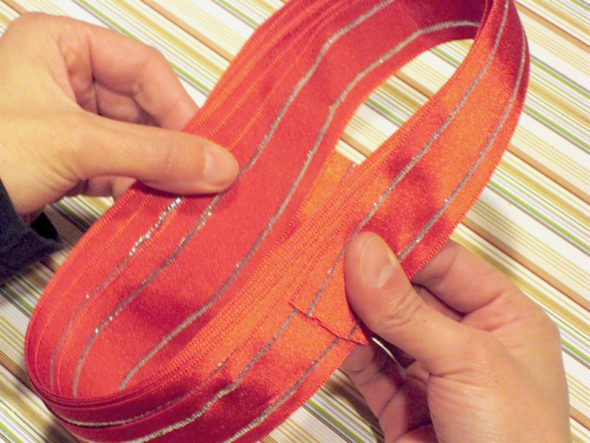
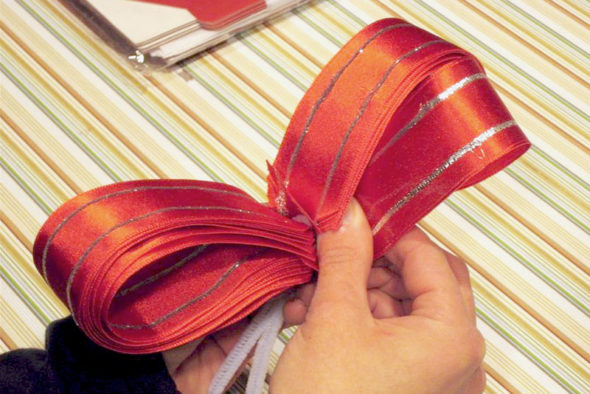
Step 2 - Creating the remaining loops
Then wrap the ribbon around about 7-10 times, or more or less if needed, depending on how full you want your bow to be.
When you cut the end of the ribbon off, be sure to let it go about an inch past the center point again, so that the end won't fall out of the bow later.
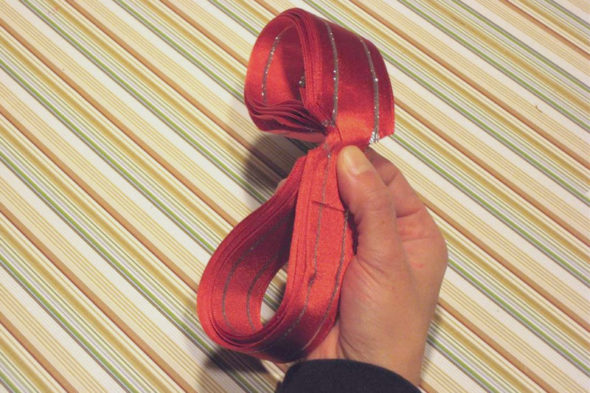
Step 3 - Opening the loops
Open up the circle of ribbon a bit, holding the two center points with your fingers. Take care not to drop the two ends of the ribbon.
Re-fold the circle so that the center points are now the end points.
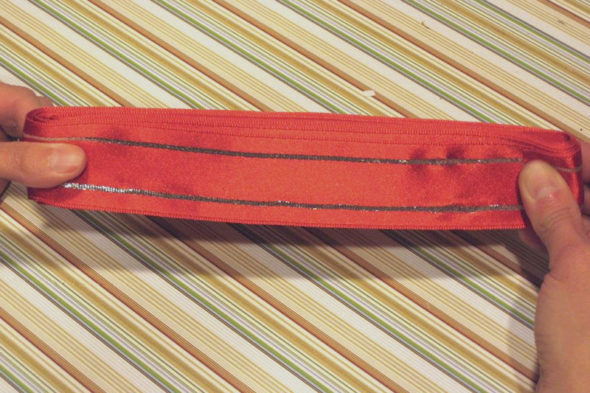
Be very careful to make sure your ends are positioned so that they go about 1-2 inches past the fold. This will keep the ends from falling out of the bow.
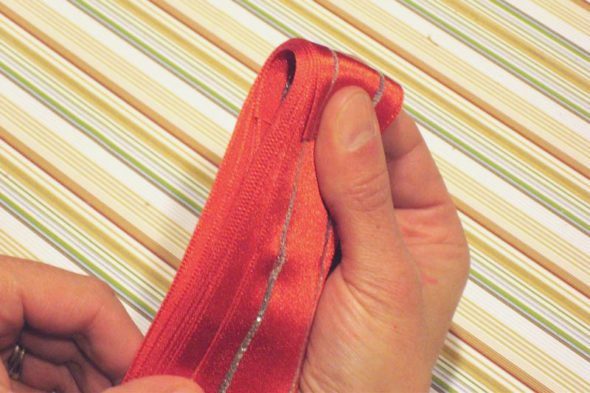
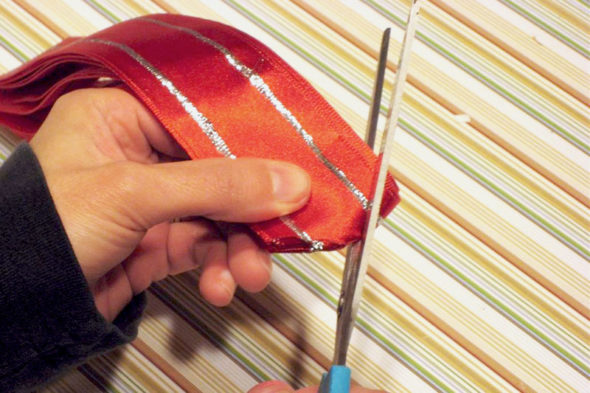
Step 4 - Removing excess ribbon bulk
Holding one of the creases firmly in your hand, use a pair of sharp scissors to snip off the corners of the ribbon. Be careful not to cut the ribbon all the way across, or else the bow will fall apart. Just notch out the corners to remove some of the bulk.
Do the same thing on the other side, notching the corners to remove some of the bulk.
Step 5 - Reforming the loops and securing the ribbon
After notching both ends, separate the circle of ribbon again, holding on to those notched parts and returning them to the center of the bow.
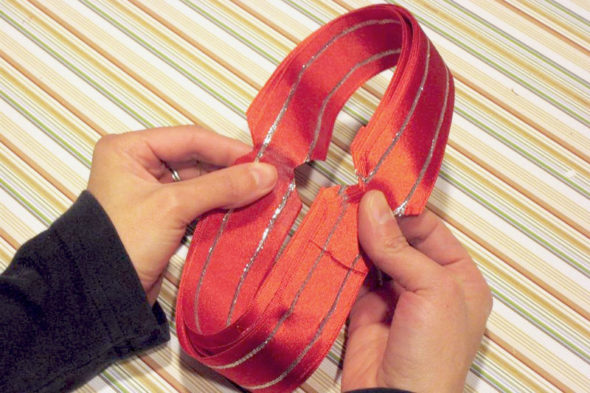
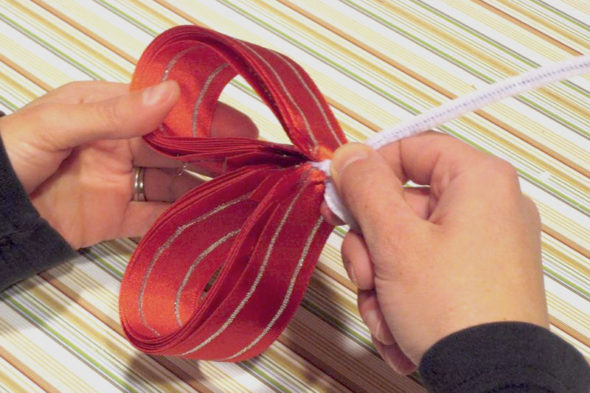
Bring both notched areas together in the middle and hold securely.
Now take a wire, chenille stem, or piece of ribbon and tie it very tightly around the notched area in the center of the bow.
Step 6 - Separating the loops
Then begin working on one set of loops to form the bow. Starting with the innermost loop, pull it out to the right...
...and give it a twist so that it's separated from the others.

Then pull the next loop out, this time to the left, and give it a twist. Continue with the remaining loops, varying the direction you pull them out and the direction you twist them, so that the loops are all independent.
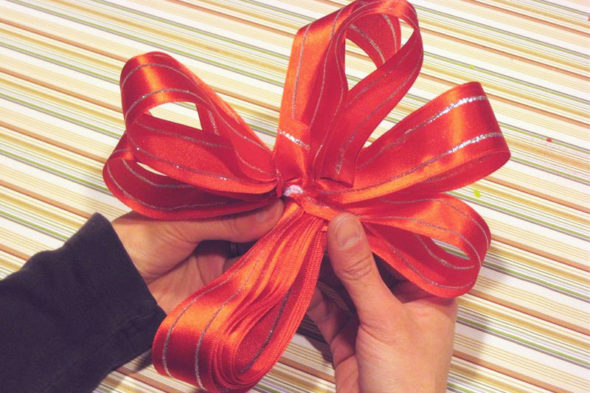
When you're done with one set of loops, do the same for the other set. When all the loops are pulled out, you can shape them and arrange them until they're just right.

Step 7 - Adding tails (optional)
For an extra special touch, you can add some ribbons to hang from the bow. Just cut a length of ribbon and lay it across the ribbon or wire you've already got on the bow.
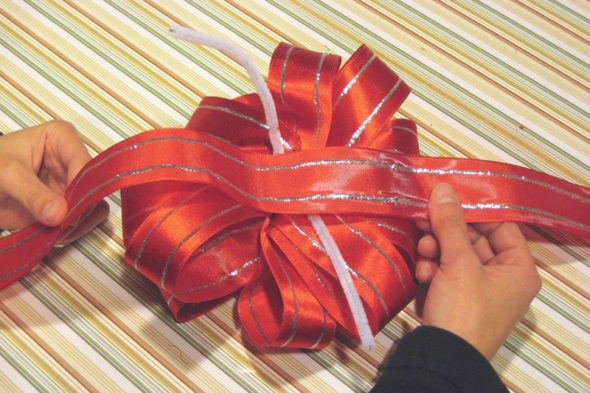
Then twist the wire (or tie the ribbon) to secure it in place.
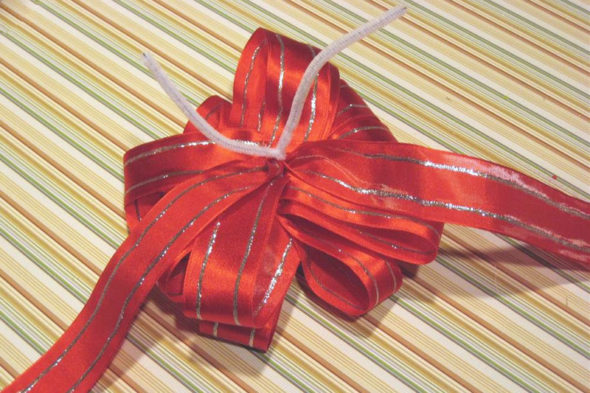
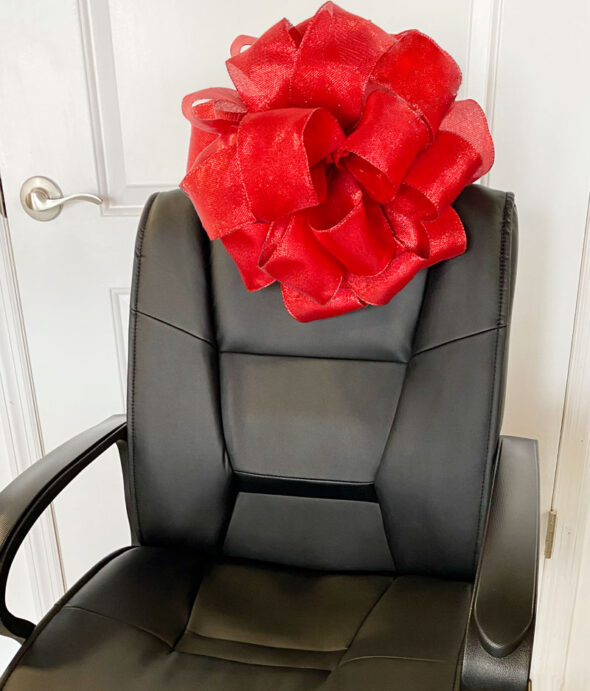
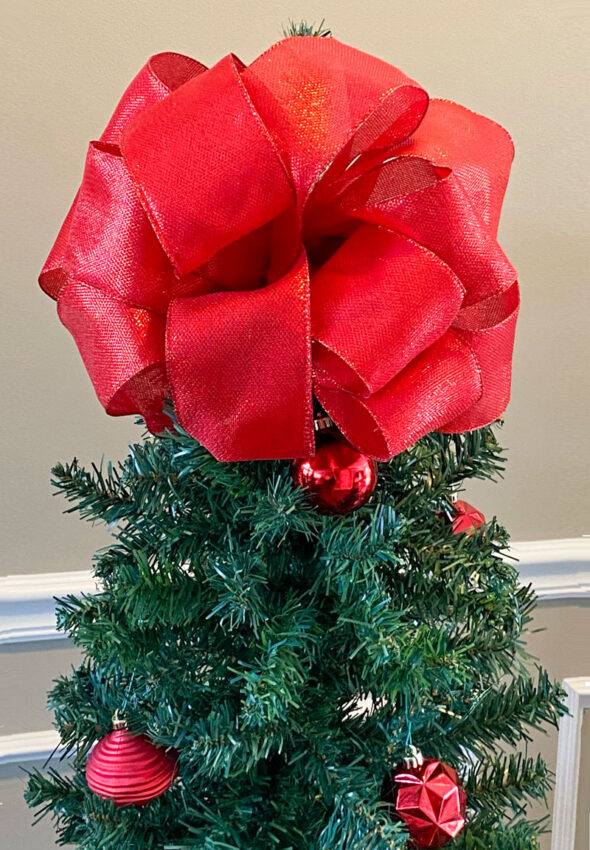
Now it's ready to hang from a wreath or basket, or adorn a special gift.
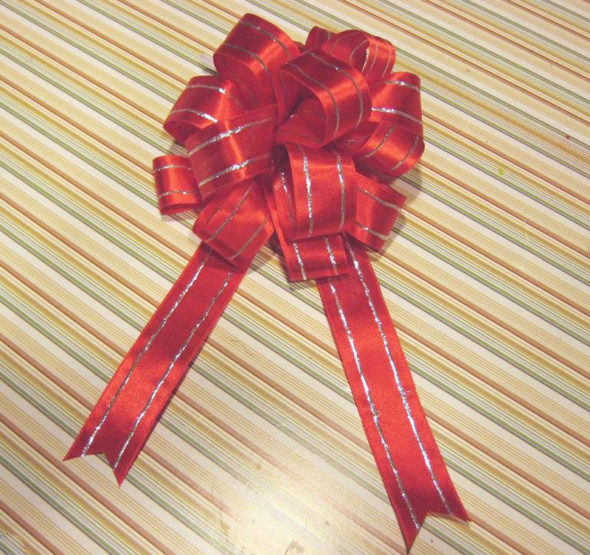
Using your finished bow
To attach it to a package or decoration, just tie in place with the wire or ribbon you tied around the center.

![]()
similar projects
leave a comment:

Hi there! We are Chica and Jo, best friends who love to create whenever we can. From fun DIY projects to elaborate parties to delicious recipes, you're sure to find ideas that will inspire you. Take a look around and follow us @chicaandjo to see what we're up to today.
looking for something?


How to Make a Car Bow Out of Ribbon
Source: https://www.chicaandjo.com/make_your_own_bows/
0 Response to "How to Make a Car Bow Out of Ribbon"
Post a Comment